
Using the Masking Tool in Topaz Sharpen AI
Topaz Sharpen AI
On some images, Topaz Sharpen AI can perform miracles, but sometimes it can also create some unwanted artefacts. With recent updates, the masking tool in Sharpen AI has had some major improvements and I’ve started using it more to selectively sharpen parts of my photos.
In this photo of a heron, I wanted to keep my ISO quite low as I was photographing backlit and ended up using a shutter speed of 1/250s. The relatively slow shutter speed is usually fine for herons as they move quite slowly, but if you look closely at the right leg it has created some motion blur.
Try any Topaz Product Free for 30 Days and use my Promo Code FRIEND15 for 15% Discount

Backlit heron
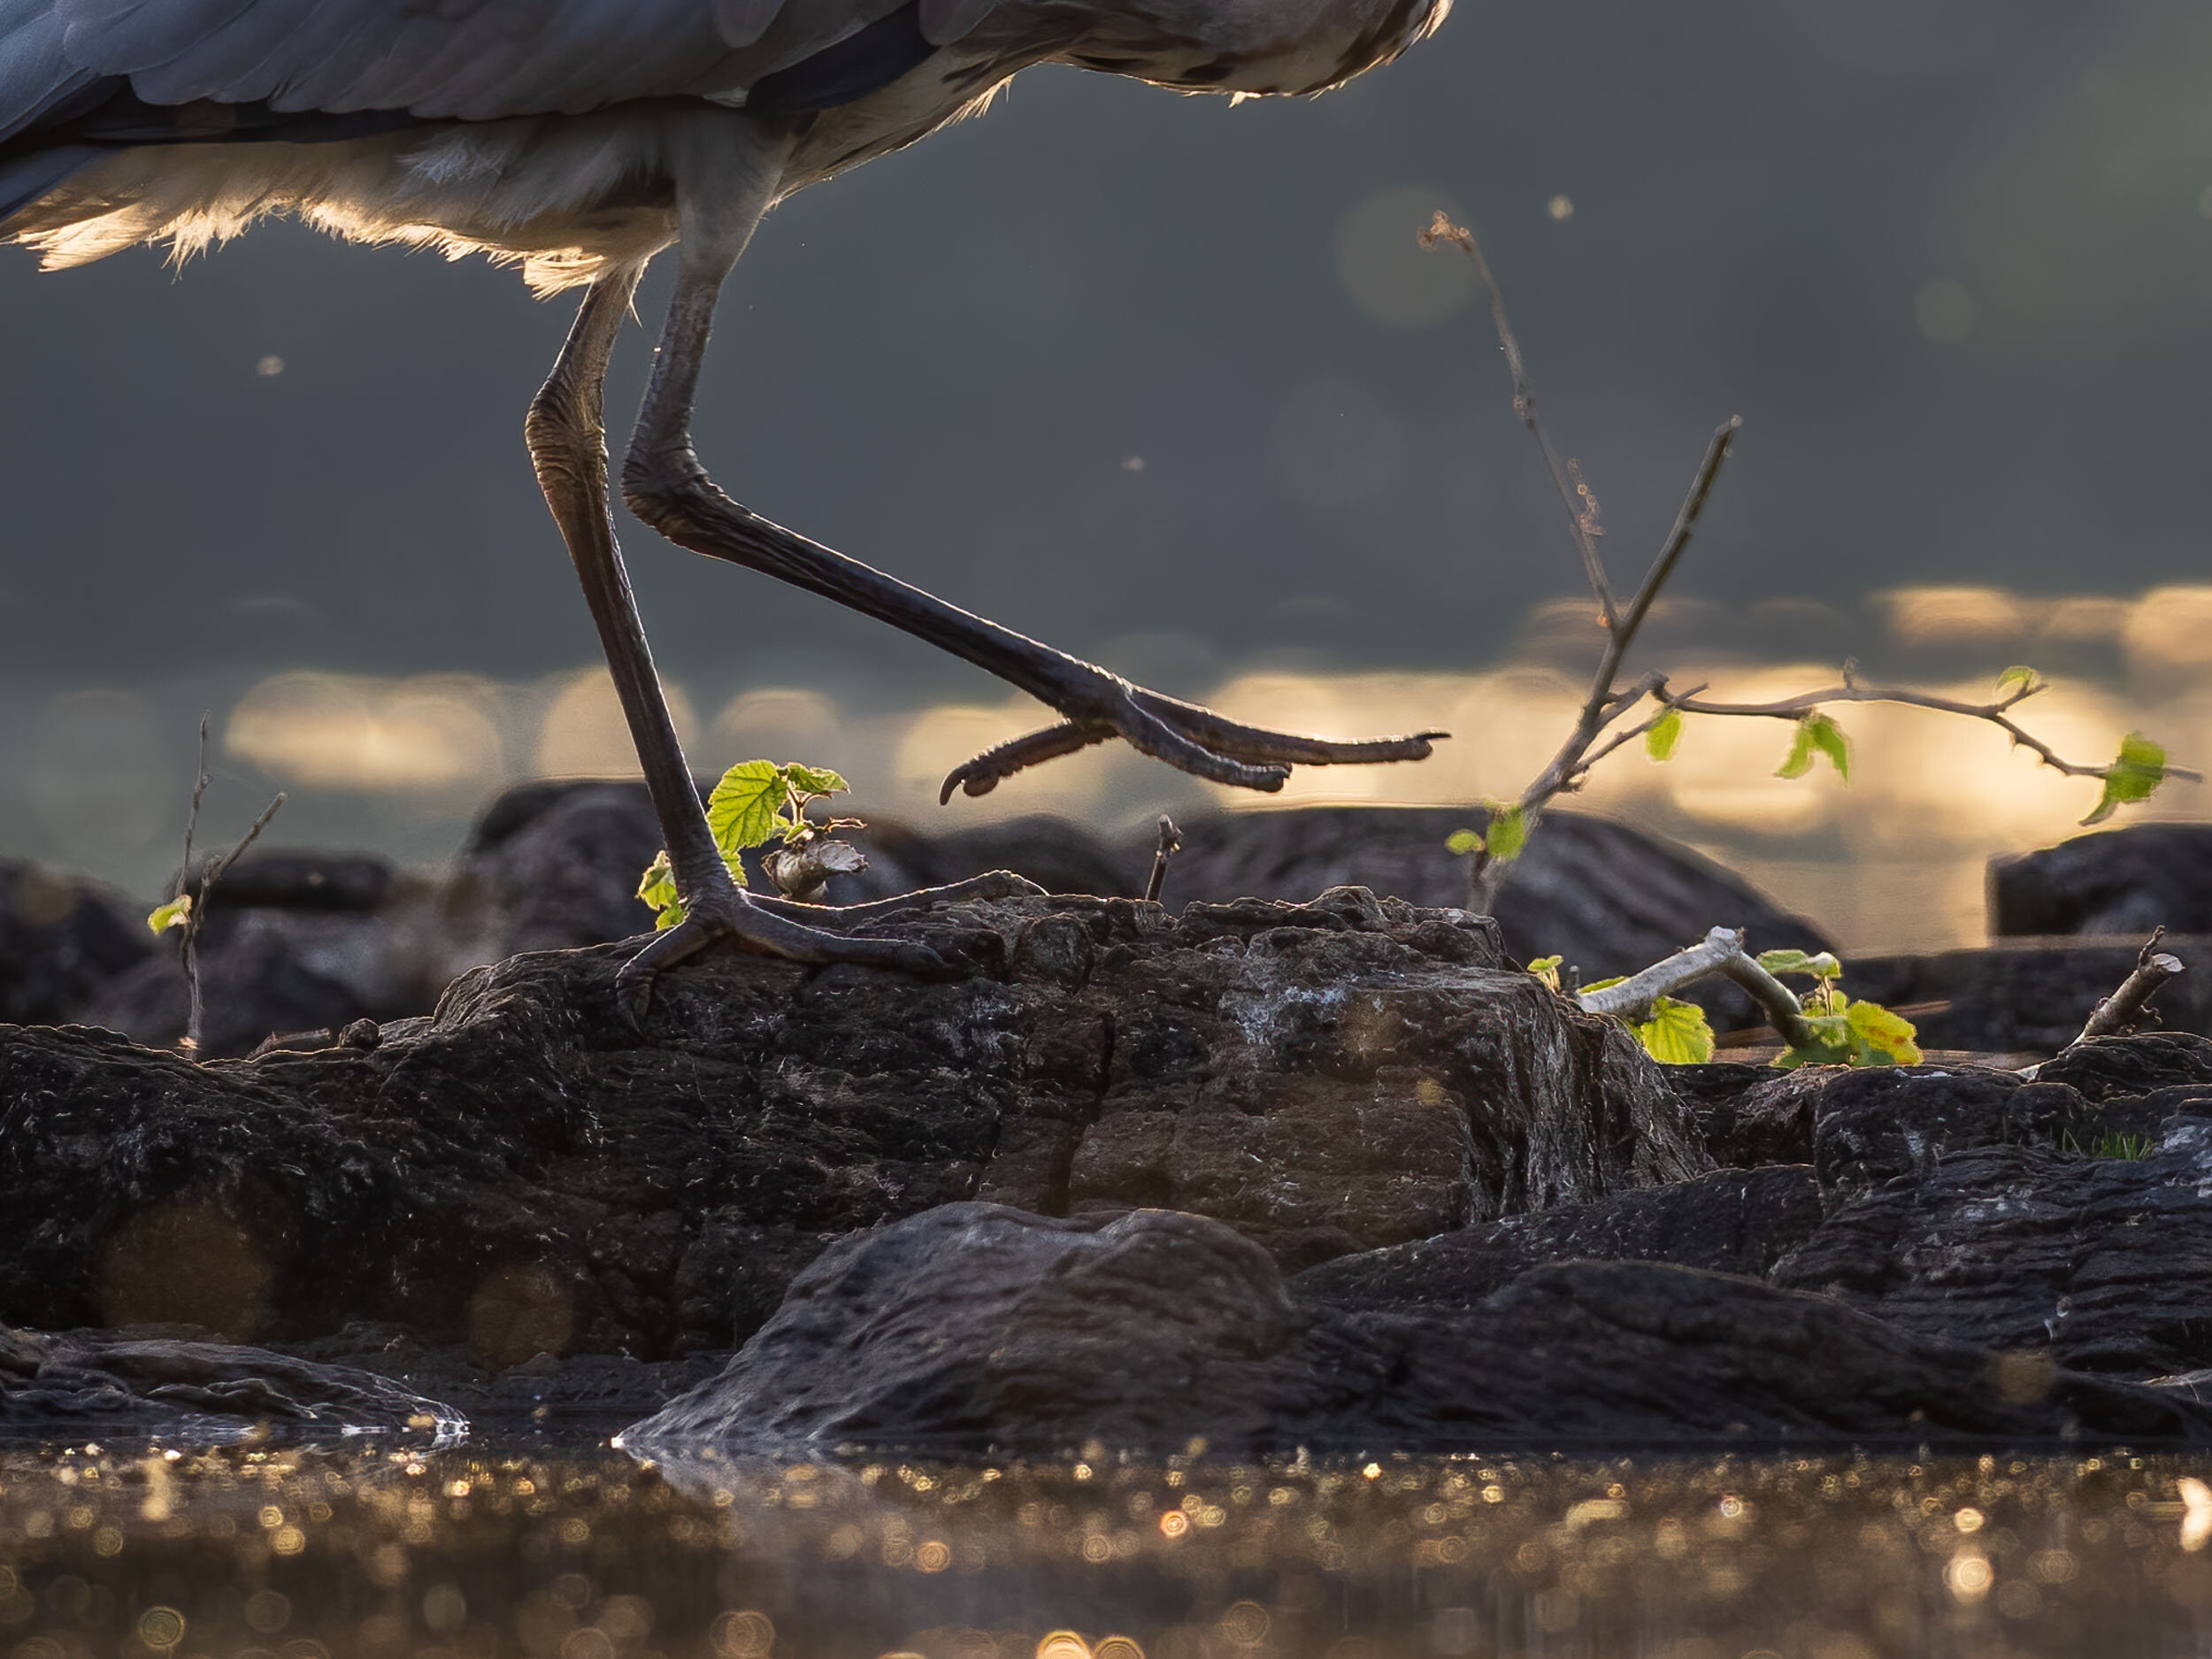
Motion blur on right foot
This image has already gone through most of my editing process, with only sharpening remaining. Check out my previous post on the workflow I use for Lightroom, Photoshop and Topaz products.
YouTube Video Walkthrough
Normally I don’t mind a little motion blur as long as I get the eyes and main part of the image sharp. However, as the background is quite bright behind the leg, the claw draws my eye in and I really would prefer that it was sharp. So to fix this blurry part of the photo I opened the image up in Topaz Sharpen AI and hoped that it could work its magic.

Masking Tool in Topaz Sharpen AI
Using the masking tool in Sharpen AI is pretty straightforward. Select the masking tool on the bottom right, adjust the brush size and start painting in what you would like sharpened. I also tick the Edge Aware box, though it’s not 100% accurate. Change to the Sub tool to subtract from the mask and press apply when done. I’m not too fuzzy in getting it an exact mask, as long as there aren’t any details I’ve painted over that I don’t want to be sharpened and could potentially create some weird artefacts, I’m happy.
A lot of the time I find that using the Auto settings in Sharpen AI works really well, but for this particular image, I changed it to Motion Blur and Very Blurry. I checked the results and found it to be a bit over the top, so I reduced the Remove Blur slider before I got the final results that I’m happy with.
Before and After Topaz Sharpen AI

Heron Before Topaz Sharpen AI

Heron After Topaz Sharpen AI
I think that the final result is a major improvement and I thought that Sharpen AI really brought out more details in the upper tarsus (what looks like a backwards knee, but it’s really the equivalent of the human ankle and heel).
Try any Topaz Product Free for 30 Days and use my Promo Code FRIEND15 for 15% Discount